Creating and selling an online course is one of the most profitable business models out there.
That’s because you can sell an online course over and over without any additional production costs.
The best part is, many course creation platforms make it easy to build your course in a short time. One of the best course creation platforms is Teachable.
So, if you’re planning to create your online course with Teachable, you’re in the right place.
In this article, I’ll walk you through the steps to build your online course with Teachable.
Want to learn more?
Read on!
Disclosure: This post contains affiliate links. If you click on an affiliate link and later make a purchase, I may receive a small commission at no additional charge to you. Money earned through affiliate links helps keep this site running.
8 Steps to Create and Sell Your Online Course with Teachable
Creating an online course with Teachable is straightforward. With just a few hours, you can have your course up and running, complete with all the necessary tools like payment processing and sales pages.
Before going through the steps, check out this Teachable review to understand its offers and know if it fits your requirements.
Follow these detailed steps to get started.
1. Set Up Your School
First, visit the Teachable homepage and click on “Get Started” to create your account.
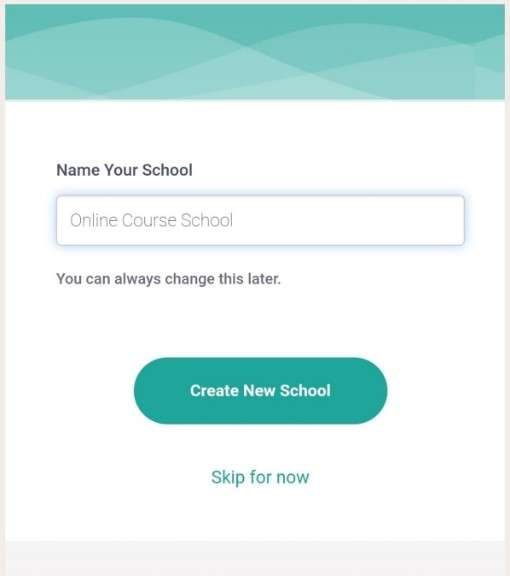
Once logged in, click on “Create New School” and provide a name for your school.
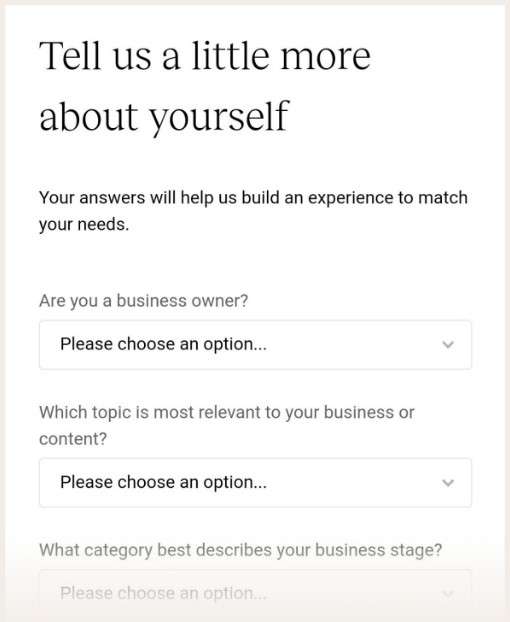
Complete setup questions.
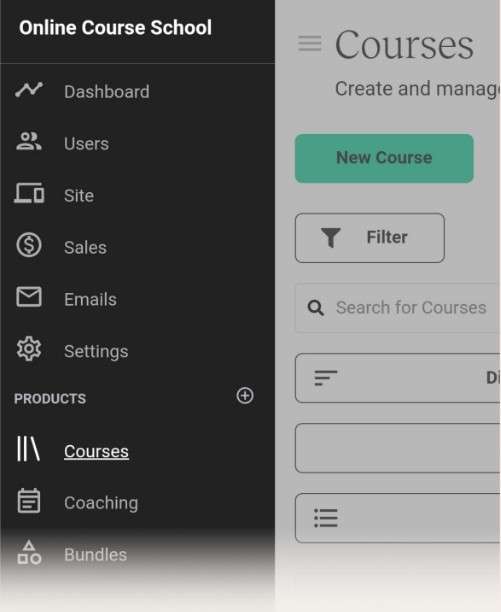
Then, you’ll be redirected to your dashboard, ready to create your course.
2. Create Your Course
To start creating your course, click on the “+” icon next to “Products” or navigate to “Courses” and select “New Course.”
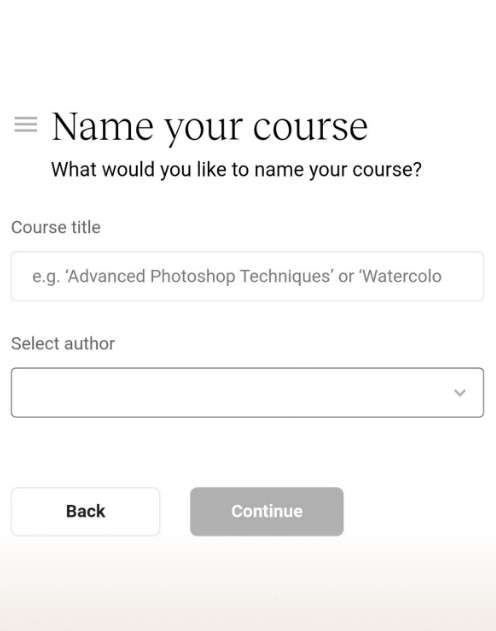
Give your course a name and choose an author.
In the sidebar, go to “Information” to begin the basic setup. Here, you can publish, preview, and delete your course, and add a custom thumbnail logo.
For the thumbnail, use a 2560x1440px JPG or PNG file type. If you plan to use the iOS app, remember that the iOS thumbnail should be 300x300px and the background image should be 1080x607px.

You can also modify your course name, add an optional subtitle, and categorize your course for easier searchability.
Lastly, set the page students will be directed to after purchasing your course; the default thank you page is a good option unless you have a specific page in mind.
3. Add Course Content
In the “Curriculum” section, you need to create sections and lectures before adding content. Sections group lectures into modules, while lectures are the individual lessons.
For example, in a personal finance course, one section might cover paying off debt, another saving money, and a third investing.
To create a section, click on “New Section,” and to create a lecture, click on the “Add New Lecture” button within the curriculum overview.
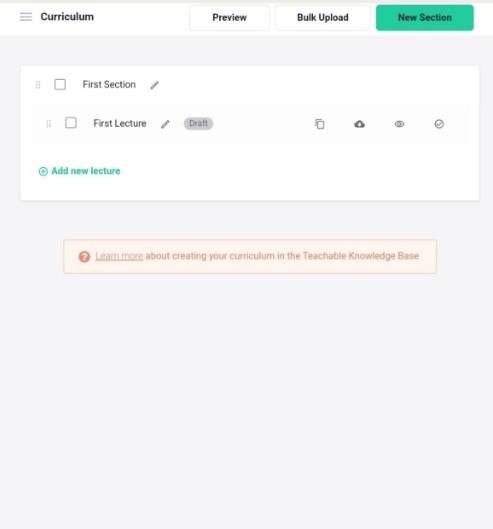
Once you have your sections and lectures, click on the lecture you want to edit and add your course files.
Supported file types include PDF, video, audio, and image, while other file types can be added as downloadable files.
Additionally, you can include text, quizzes to track student performance, live video streams, or embed YouTube videos in the “Custom Code” section.
You can also set upsells and previews for your lectures, allowing prospective students to preview the course before purchasing.
4. Design Your Course
To design your course, go to “Site” in the sidebar and select “Theme.”
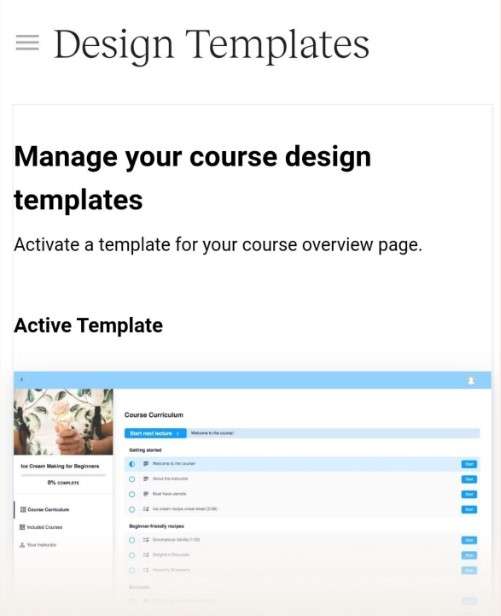
Here, you can customize your school’s logo, branding, colors, and fonts. To modify the design of your course page, go to “Curriculum” and “Design Templates.”
You can choose between classic, simple, and colossal templates. It’s best to stick with the default theme (classic) unless you have a specific preference.
Recommended Articles:
Teachable Review 2024: Features, Pros and Cons
How to Create an Online Course and Start Earning
7 Best Online Course Platforms in 2024
5. Price Your Course
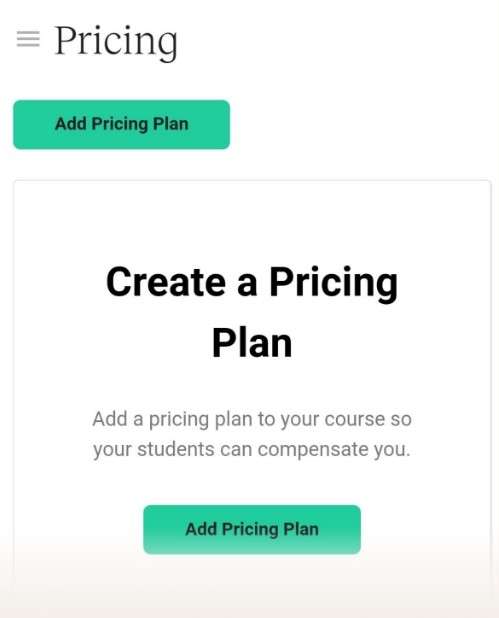
Navigate to “Pricing” and click “Add Pricing Plan.”
You have four pricing options available on Teachable: free, one-time purchase, payment plan, and subscription.
For first-time course creators, a one-time purchase is the simplest and most straightforward option.
Set your course price within a range of $47 to $497, depending on the value and content of your course.
6. Create Your Pages
Before you can start selling your course on Teachable, you need to set up several essential pages.
Go to “Site” and click on “Pages.”
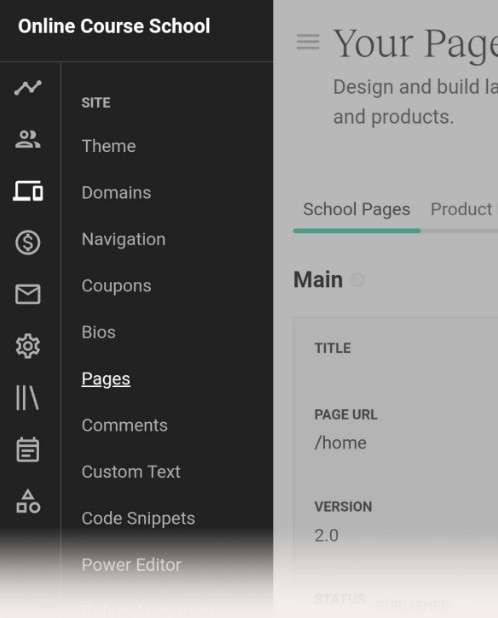
In “School Pages,” set up your homepage, Terms and Conditions, and Privacy Policy.
You can also add other pages like About or Contact if needed. To set up your product pages, go to “Courses” and click on “Pages.”
Here, you’ll set up your sales page, checkout page, and thank you page. Teachable’s page builder is a drag-and-drop tool, making it easy to create beautiful web pages without any technical skills.
If you’re unsure how to create a profitable sales page, consider using proven sales page templates.
7. Optimize Your Course
Teachable offers various customization options to optimize your course. If you have a paid account, set up a custom domain under “Site” and “Domains.”
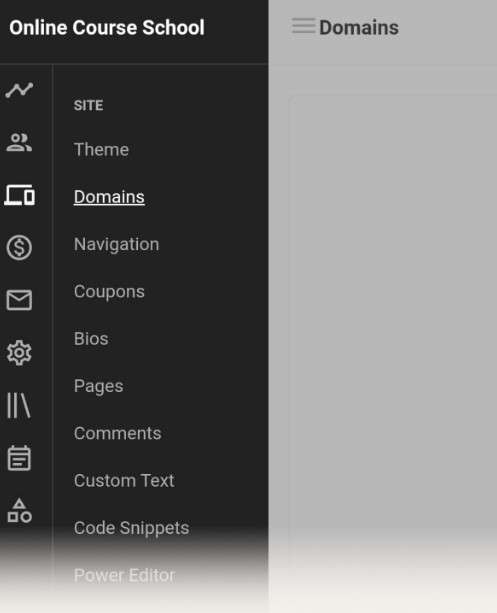
You can also adjust site navigation to control what students see in the navigation bar. In the “Site” section, you can add features like coupons and referral programs to increase your course sales.
However, focus on making your first sales before exploring these tools. Advanced users can add custom code for a more personalized experience, but this is optional for first-time course creators.
8. Set Up Emails
With a paid account, you can set up automated emails on Teachable to enhance the customer experience. Use emails to welcome students to your course and notify them of any updates.
Here’s an example of email template for a welcome email:
Welcome to [Your Course]!
[Tell your students about the results they can achieve with your course.]
In these [X] classes, I will share steps to [Your Course Topic].
Here’s an overview of [Your Course]:
[Guide students on how to use your course, e.g., “Each lesson ends with a quiz to unlock the next lesson.”]
[Sign-off]
Congratulations! You’re now ready to publish your course on Teachable. With these steps, you can confidently create and launch your online course, providing valuable content to your students.
Tips to Successfully Sell Your Course on Teachable
Here are some tips to effectively market and sell your course on Teachable.
1. Know Your Audience: Understand your target audience’s needs, pain points, and interests. Tailor your course content to address these specific areas to make your course more appealing.
2. Create High-Quality Content: Ensure your course materials are well-organized, engaging, and professionally presented. Use a mix of videos, quizzes, assignments, and downloadable resources to keep learners engaged.
3. Set the Right Price: Research similar courses and price yours competitively. Consider offering multiple pricing tiers, such as a basic version and a premium version with extra content.
4. Offer Free Previews: Allow potential students to access a few lessons for free. This can give them a taste of your teaching style and the value your course offers, increasing the likelihood of them purchasing the full course.
5. Build a Strong Sales Page: Create a compelling sales page that highlights the benefits of your course. Include testimonials, success stories, and a detailed curriculum outline. Use high-quality images and videos to make the page visually appealing.
6. Leverage Social Proof: Share testimonials and reviews from past students to build credibility and trust. If possible, include case studies or success stories that showcase the impact of your course.
7. Use Email Marketing: Build an email list and send regular updates to your subscribers. Offer valuable content, promotions, and discounts to keep them engaged and interested in your course.
8. Promote on Social Media: Use social media platforms to promote your course. Share valuable content related to your course topic, engage with your audience, and run targeted ads to reach potential students.
9. Offer Limited-Time Discounts: Create a sense of urgency by offering limited-time discounts or bonuses. This can encourage potential students to purchase your course sooner rather than later.
10. Engage with Your Students: Provide excellent customer support and engage with your students regularly. Answer their questions, provide feedback, and foster a community around your course. Satisfied students are more likely to recommend your course to others.
11. Optimize for SEO: Ensure your course title, description, and sales page are optimized for search engines. Use relevant keywords to increase the visibility of your course in search results.
12. Collaborate with Influencers: Partner with influencers or bloggers in your niche to promote your course. They can help you reach a broader audience and lend credibility to your course.
Final Thoughts
That’s it!
That’s how you use Teachable to create and sell your online course.
With this Teachable tutorial, you’ll have your course set up in no time, allowing you to focus on selling it and building your course business.
So, which type of course are you planning to create?
Let me know in the comments!


Pingback: A Simple Guide to Getting Started on Fiverr – Mercy Maiyo
Thanks for this post! I plan on creating a course at some point and this helps make it seem more doable!
Thank u. Thinking of creating a course myself and found this helpful to start